A small loop sticking out of your football shirt is not a reason to reach for scissors. If the yarn is still intact, a suitable snag-repair tool may move the loop to the inside. If it has broken, formed a hole or opened a seam, that is a different repair.
This guide explains how to fix a pull in a football shirt by identifying the damage first, understanding what a snag needle can do and deciding when to stop. It does not promise an invisible repair or assume that every jersey has the same construction.
First decide what you are looking at
Lay the shirt on a clean, well-lit surface without stretching the damaged area. Take one photograph of the whole panel and another close-up. Look at both sides before touching the loose thread. A photograph gives you a useful reference if you later ask the seller or a repairer for advice.
If the shirt arrived damaged, document it and contact the seller before attempting a repair. Keep the order details and care label available. That lets you discuss the actual condition without making further changes first; it is not a promise about any particular returns outcome.
What a snag-repair needle actually does
Prym's Snag Wizard has a ribbed spiral end rather than an ordinary needle eye. Its instructions describe inserting it beside the affected thread and turning it so that the thread can be drawn to the back. This relocates a protruding thread; it does not supply replacement fabric.
Korbond's snag needle instructions use a slightly different sequence: place the point at the snag's centre, carefully pass it towards the reverse so that the rough section catches the loop, then remove it with a slight twist. Follow the directions for the actual tool you have, rather than combining different products' steps.
Neither description establishes that a particular needle is suitable for your exact shirt. A fine panel, a decorated area and a heavier knitted garment are not interchangeable test pieces. If you cannot tell whether the tool will pass through without forcing the fabric, take the shirt to someone who repairs that type of material.
A cautious sequence for a small, intact pull
- Identify the panel and the damage. Confirm that you can see an intact loose loop rather than a cut thread or open seam. Keep names, numbers and badges out of the working area.
- Check suitability before starting. Read the tool instructions and ask a repairer if the fabric is unusually fine, fragile or unfamiliar. Do not practise on a valuable shirt.
- Support the garment. Keep the affected panel accessible from both sides. Separate it from the opposite side of the shirt so that you can see where the tool will emerge.
- Use the maker's method. For an appropriate snag tool, the aim is to move the existing loop to the reverse, not to remove it. Work slowly and stop if the fabric resists, the hole widens or the yarn begins to break.
- Inspect the result without stretching it. Compare the front with your photograph. A less prominent loop is an improvement, but a remaining line or distortion is not proof that another forceful attempt will help.
The community-contributed iFixit loose-thread guide illustrates the general idea on knitwear. It is useful for understanding the direction of the repair, but its example is not a test on your football shirt. We would not transfer its handling instructions automatically to an unknown lightweight jersey.
Do not cut the loop to make it disappear
Prym's repair and care brochure specifically advises against reaching for scissors when dealing with pulled threads. Removing the visible projection is not the same as restoring the garment. Keep the thread intact while you assess the repair.
Also keep this job separate from ironing or reattaching a print. A loose yarn does not establish a need for heat, glue or solvent. If your problem is a lifted name or number, read the football shirt print repair guide instead. Do not push a needle through a printed graphic simply because the damage is nearby.
When a repairer is the better choice
Ask for an assessment when several threads are damaged, the snag crosses a prominent graphic, the fabric has a visible hole, or the item has particular sentimental or collecting value. Explain whether you want the loop made less noticeable, a hole stabilised or a seam closed. These are different outcomes, and the quote should identify which is achievable.
Useful questions include: Will a mark remain? Does the repair need extra thread or a patch? Can the work affect a nearby print? Is doing nothing preferable to the available repair? There is no need to accept a promise of an invisible result without seeing what the repairer means for your actual garment.
Keep the product record with the shirt
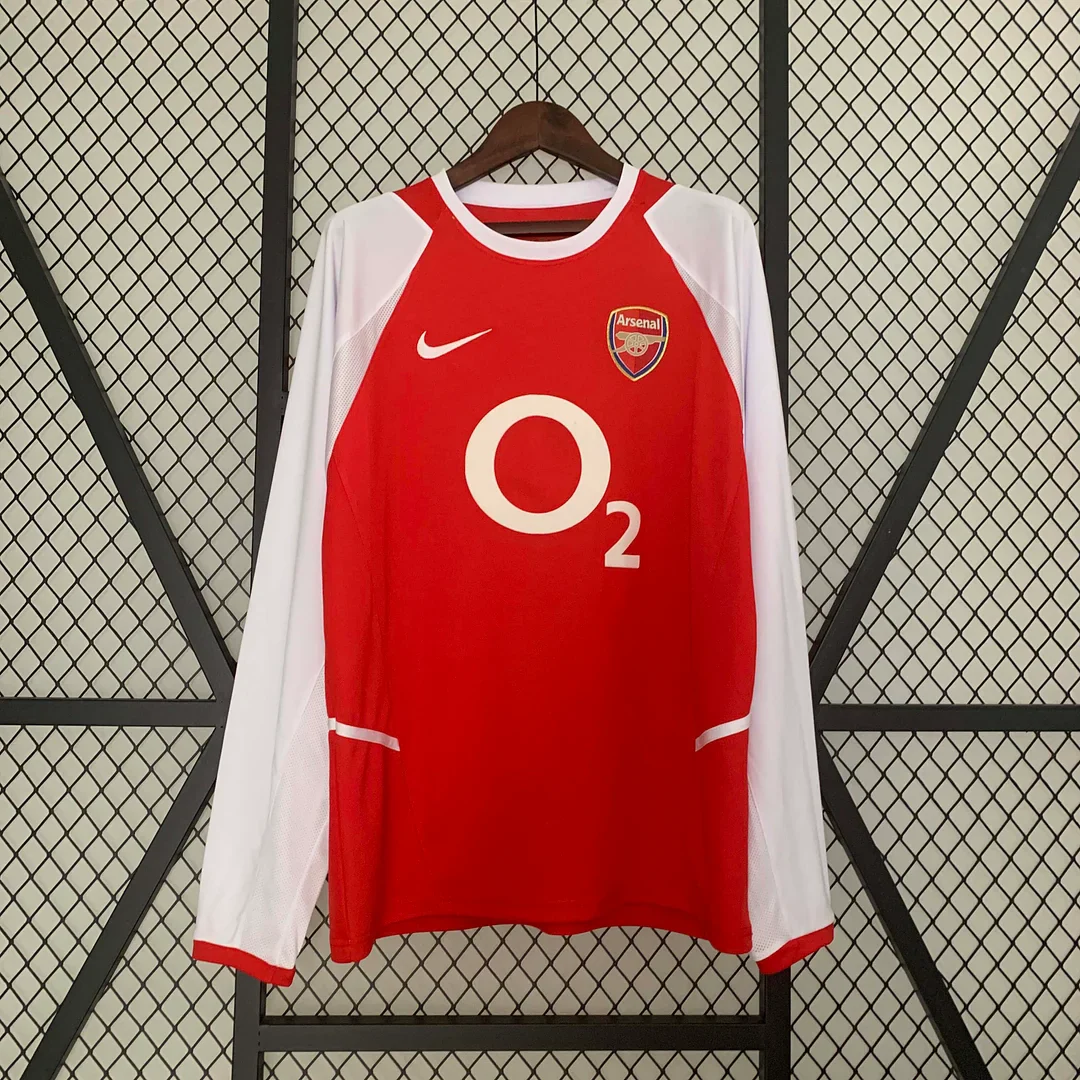
Product example, not a damaged shirt or repair demonstration. The Arsenal retro 2003/04 home long-sleeve listing identifies the design being sold. Its photograph does not establish a repair method or the age of the actual garment. Save the exact listing and the label supplied with your purchase, rather than identifying an item only as a red Arsenal shirt.
If you are comparing another shirt in the Arsenal collection, check its own details. A shared club or season label does not make repair advice transferable. For routine cleaning after the damage has been assessed, use the label-first football shirt washing checklist.
Summary
To deal with pulls in football shirts, identify an intact loop before choosing a tool. A suitable snag needle moves the loop to the reverse; it does not mend every hole, broken yarn or loose print. Avoid cutting the thread, follow the tool maker's directions and stop if the fabric resists. For fragile or valuable shirts, an assessment is more useful than repeated experimentation.
Sources and research scope
Reviewed on 28 October 2026 using the linked tool-maker instructions, repair guidance and product listing. This is a documented decision guide, not a hands-on repair test. FootballTHJORE sells the linked shirts and benefits from purchases. The pictured shirt has not been tested with the repair tools discussed here.
 USD
 ANG(ƒ)
 LKR(₨)
 EGP(EGP)
 BZD(BZ$)
 CRC(¢)
 MAD(DH.)
 OMR(RO.)
 KES(KSh)
 GHS(₵)
 UGX(USh)
 RSD(RSD)
 RON(lei)
 PGK(K)
 CDF(CDF)
 UYU($U)
 KZT(〒)
 PKR(Rs)
 MNT(₮)
 ARS(ARS$)
 COP(COP)
 MVR(Rf)
 IQD(د.ع)
 BDT(Tk)
 ZMW(ZK)
 NAD(N$)
 JMD(J$)
 AOA(Kz)
 MMK(K.)
 PEN(S/.)
 MOP(MOP$)
 BND(B$)
 LAK(₭)
 VND(₫)
 NGN(₦)
 KHR(៛)
 TWD(NT$)
 CNY(¥)
 SAR(S.R.)
 BHD(BD.)
 QAR(QR.)
 KWD(K.D.)
 UAH(₴)
 IDR(Rp)
 MYR(RM)
 AED(AED)
 JPY(円)
 INR(Rs)
 TRY(₺)
 CLP(CLP)
 KRW(₩)
 ZAR(R)
 SEK(Kr)
 ILS(₪)
 HKD(HK$)
 THB(฿)
 PLN(zł)
 NZD(NZ$)
 NOK(Kr)
 MXN(MXN$)
 HUF(Ft)
 CZK(Kč)
 SGD(S$)
 PHP(₱)
 DKK(kr.)
 CHF(CHF)
 BRL(R$)
 RUB(₽)
 CAD(CA$)
 AUD(A$)
 GBP(£)
 EUR(€)
 Barcelona
 Real Madrid
 Manchester United
 Inter Miami
 Manchester City
 Fc Bayern
 Ac Milan
 Chelsea
 Juventus
 Arsenal
 PSG
 Liverpool
 Inter Milan
 Santos FC
 Roma
 Portugal
 Al Nassr
 Atletico Madrid
 Everton
 Everton
 Germany
 Ajax
 Mexico
 Napoli
 Columbia
 Sporting lisbon
 France
 Tottenham
 Morocco
 Real Betis
 Brazil
 USA
 ltalia
 Argentina
 England
 Borussia Dortmund
 Spain
 Japan
 Netherlands
 Adidas
 Nike
 Puma
 NB
 Kappa